
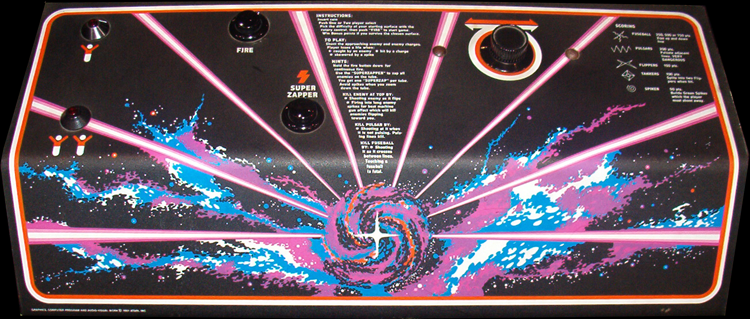
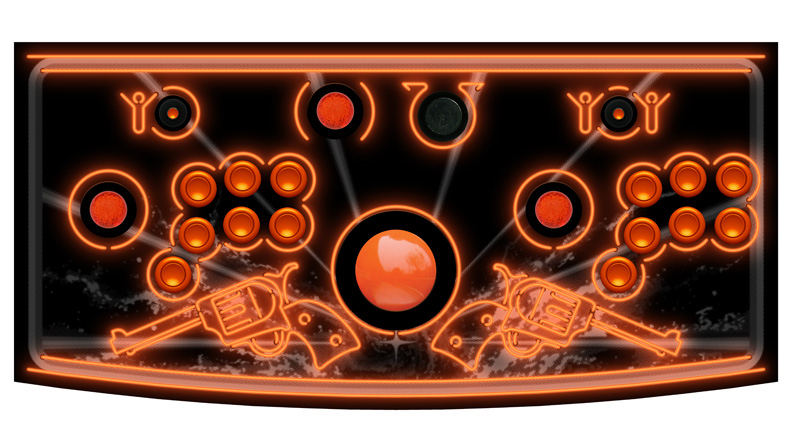
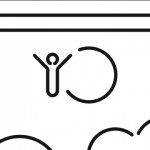
I ended up needing to change the layout of my Cowboy Arcade Control Panel and therefore had to redo the Control Panel Overlay Art. Just to remind you, my Arcade Cabinet is patterned after a Tempest game. I got rid of the numbers for player 1 and player 2 and instead rendered the little Atari guys in neon.
Here is the finished Control Panel Overlay with the various buttons and controls mocked up:
 The process of creating the neon tube effect is fairly complicated and took me a long time to get right. When I was done I had a process that involved more than a dozen steps and created 9 separate layers in PhotoShop. The whole thing starts with a vector drawing of the neon in Freehand… The process of creating the neon tube effect is fairly complicated and took me a long time to get right. When I was done I had a process that involved more than a dozen steps and created 9 separate layers in PhotoShop. The whole thing starts with a vector drawing of the neon in Freehand… |
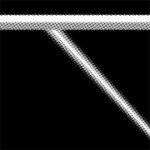 To keep the Tempest theme as much as possible I converted the original Tempest Cab artwork to black and white and then turned it into a halftone. This forms the background of the Cowboy Arcade art with the intention that it will look like the Tempest artwork was there and the neon was put on top of it… To keep the Tempest theme as much as possible I converted the original Tempest Cab artwork to black and white and then turned it into a halftone. This forms the background of the Cowboy Arcade art with the intention that it will look like the Tempest artwork was there and the neon was put on top of it… |
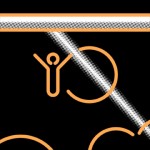 Next the Freehand neon outline (outline) is imported and filled with PMS 152 given a gaussian blur of 1… Next the Freehand neon outline (outline) is imported and filled with PMS 152 given a gaussian blur of 1… |
 Then the outline is filled with PMS 172 the selection is contracted 10 and feathered 5 before deleting and then blurring 1. This creates a denser color toward the edge of the tube… Then the outline is filled with PMS 172 the selection is contracted 10 and feathered 5 before deleting and then blurring 1. This creates a denser color toward the edge of the tube… |
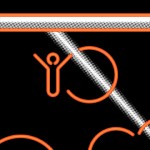 Next a 3 pixel border inside the outline is filled with black, blurred a very small amount and set to 15% transparency. This creates the illusion of there being thickness to the actual tubing… Next a 3 pixel border inside the outline is filled with black, blurred a very small amount and set to 15% transparency. This creates the illusion of there being thickness to the actual tubing… |
 Now that we have a neon tube with some variation between the internal color and the color at the edges and a hint of the glass, we need this thing to glow. First glow is internal and is the outline filled with PMS 172, blurred 10 and set to screen. Now that we have a neon tube with some variation between the internal color and the color at the edges and a hint of the glass, we need this thing to glow. First glow is internal and is the outline filled with PMS 172, blurred 10 and set to screen. |
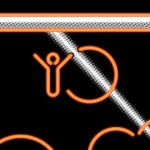 To help our minds complete the illusion that the neon is actually above the background art we need to simulate the holes the neon would come through in a real application. These holes are cut out of the background and also kept as a separate layer to allow for some darkening of the hols after the external glow happens… To help our minds complete the illusion that the neon is actually above the background art we need to simulate the holes the neon would come through in a real application. These holes are cut out of the background and also kept as a separate layer to allow for some darkening of the hols after the external glow happens… |
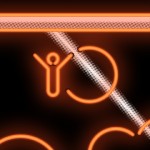 To make the neon look like it is lit I expanded the outline by 30, filled with PMS 172 then blurred it 100 and set it to 75%… To make the neon look like it is lit I expanded the outline by 30, filled with PMS 172 then blurred it 100 and set it to 75%… |
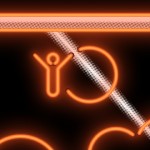 Still needed a little more umph, so another outline expanded 30, filled with PMS 172 and blurred 25 then set to 25% and screen… Still needed a little more umph, so another outline expanded 30, filled with PMS 172 and blurred 25 then set to 25% and screen… |
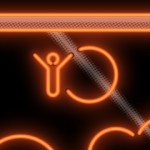 Finally, we need to darken the background where the neon is not close to it. The easiest way to do this was to select the big blur from two step ago, select the inverse and fill it black then set to 80%… Finally, we need to darken the background where the neon is not close to it. The easiest way to do this was to select the big blur from two step ago, select the inverse and fill it black then set to 80%…
Also, those holes we cut out of the background are on their own layer and set to 75% and placed above the big blur layer. The PMS 172 and 150 are Oklahoma State University colors. |